Getting Started with ampy
Adafruit MicroPython tool or ampy
Introduction
ampy is a simple cross-platform command line tool that provides functionality to access MicroPython’s filesystem without being too complex.
Earlier if you have worked on basic commands in REPL then you had to type in the command-line/terminal everytime you were supposed to run the program in ESP8266. This can be very tedious when you are working on some large projects so you won’t like typing each time during testing phase. Here, ampy comes in work it allows you to type the programs in the web editor and then transfer those files in the ESP8266 board, where you can directly run the files and it provides a lot many features associated with the file-system that will save a lot of time.
Installing ampy
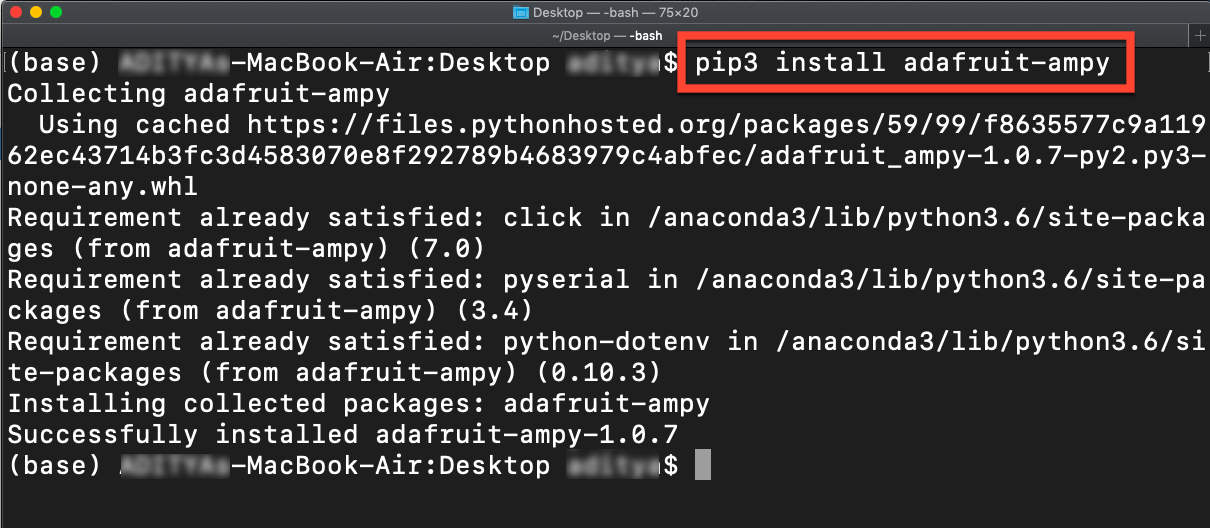
Make sure you are running the Python 3.x version of pip.
sudo pip3 install adafruit-ampy
Note: If you are using windows then you’ll need to install Python and be sure to check the box during installation to add python to your system path.
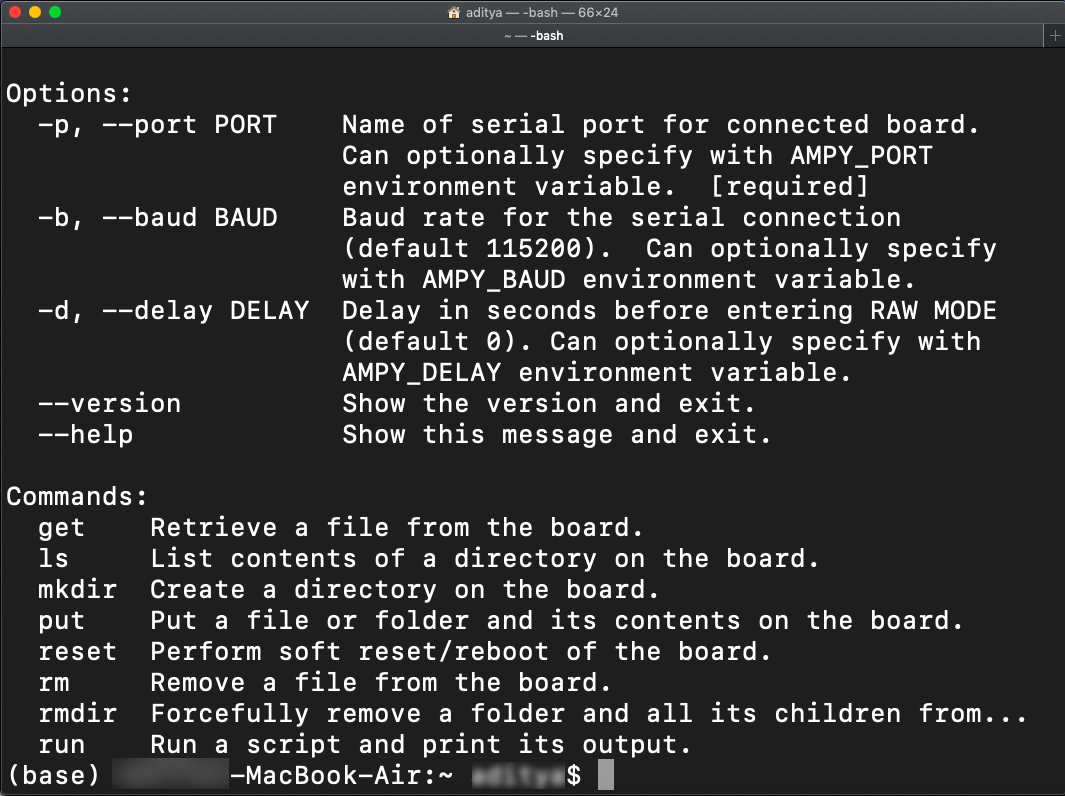
To check that ampy installed successfully run the following command to print its usage:
ampy --help
If the following screen is displayed then Congratulations you have successfully installed ampy on your system.
connect to the board’s serial REPL On MacOS
picocom /dev/tty.SLAB_USBtoUART -b115200
On Linux
picocom /dev/ttyUSB0 -b115200
Disable ESP8266 Debug Output
For ESP8266-based boards before using a tool like ampy you might need to disable debug output on the board.
To disable debug output connect to the board’s serial REPL and run the following commands:
import esp
esp.osdebug(None)
The esp.osdebug function should run and return no output. After running the command debug output will not be printed to the serial terminal and you can use tools like ampy.
It is highly recommended to add the above two lines to the board’s boot.py so debug output is disabled permanently. If you don’t make this change you’ll need to manually disable debug output every time you reset the board!
Quitting REPL
ctrl-A + ctrl-Q
Creating a test file
Create a file in your favourite editor with the following codes and save it with the filename test.py
print("Hey, you have successfully tested the code. It's working Voila !!!")
for i in range(1,10):
    print(i)
Running the file test.py
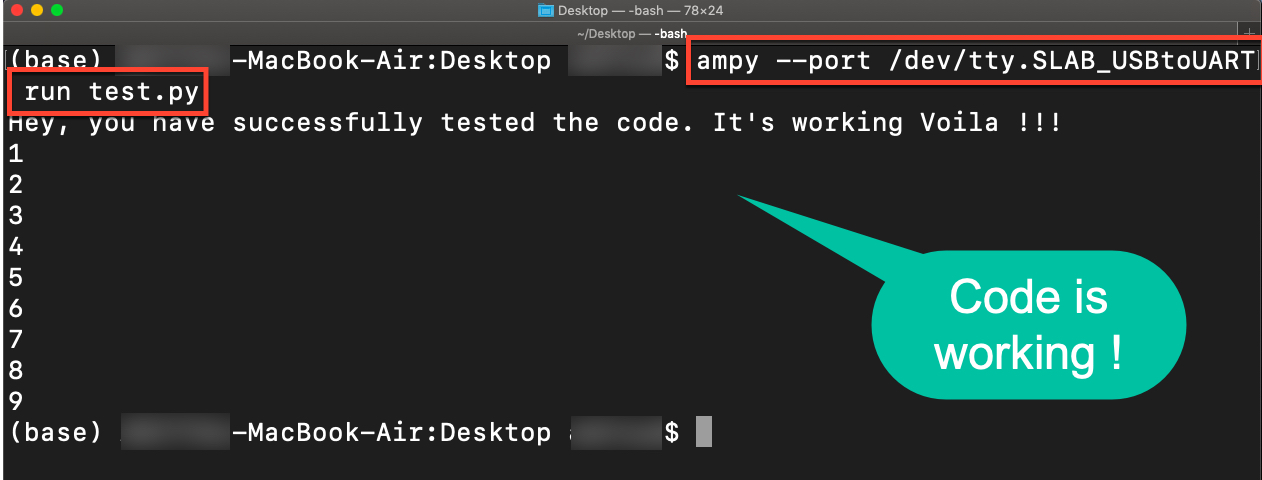
In a terminal in the same directory as test.py run the following ampy command to execute the script on a connected MicroPython board:
For MacOS
ampy --port /dev/tty.SLAB_USBtoUART run test.py
For Linux
ampy --port /dev/ttyUSB0 run test.py
File Operations
In addition to running code ampy you can also manipulate files on a MicroPython board’s filesystem. You can copy files from your computer to the board, read files from the board back to your computer, and even create and manage directories on the board.
MicroPython’s filesystem is similar to Unix filesystems that separate parts of the path with forward slashes (‘/’) between parent directories. For example a file /foo/bar.txt on a MicroPython board exists in a folder foo under the root of the board.
Some useful commands used in ampy
- put : The put command can copy files from your computer to a MicroPython board.It can also be used to copy the directories.
Syntax :
ampy --port /serial/port put test.py - get : The get command can read and copy files from a MicroPython board to your computer.
Syntax :
ampy --port /serial/port get boot.py - mkdir : You can create hierarchies of folders on the MicroPython board’s filesystem with the mkdir command.
Syntax :
ampy --port /serial/port mkdir foo - ls : You can list the file and folder contents of a directory with the ls command. If you don’t specify any argument to the ls command then the contents of the MicroPython board’s root will be listed. However if you’d like to list the contents of a different directory just specify its path on the board as an argument.
Syntax :
ampy --port /serial/port ls - rm : The rm command can remove a file or directory from a MicroPython board’s filesystem. To use the command just specify as an argument the path to the file or directory on the board to delete. Note that directories must be empty before they can be deleted!
Syntax :
ampy --port /serial/port rm test.py
ampy --port /serial/port rmdir /foo/bar
Filesystems
There are two important files that MicroPython looks for in the root of its filesystem. These files contain MicroPython code that will be executed whenever the board is powered up or reset (i.e. it ‘boots’). These files are :
- /boot.py - This file is run first on power up/reset and should contain low-level code that sets up the board to finish booting. You typically don’t need to modify boot.py unless you’re customizing or modifying MicroPython itself. However it’s interesting to look at the contents of the file to see what happens when the board boots up. Remember you can use the ampy get command to read this and any other file!
- /main.py - If this file exists it’s run after boot.py and should contain any main script that you want to run when the board is powered up or reset.
You can create and edit the main.py on a board using the file operations in ampy or you can copy other file on your system to the main.py
ampy --port /serial/port put test.py /main.py
Reset the board or unplug it and plug it back in, then connect to the serial REPL and notice the board is counting numbers! The main.py code started as soon as the board finished booting.
Voila ! Now you are all set to write your own codes and run them.
LED Blinking on NodeMCU ESP8266
Open any editor and copy the following in the file and save the filename as led_blink.py
import machine, time

led = machine.Pin(2, machine.Pin.OUT)

for i in range(20):
    led.off()
    time.sleep_ms(500)
    led.on()
    time.sleep_ms(500)
Now open the terminal and move to the directory where led_blink.py file is saved and paste the following code in the terminal
on MacOS
ampy --port /dev/tty.SLAB_USBtoUART run led_blink.py
on Linux
ampy --port /dev/ttyUSB0 run led_blink.py
if you want to save the file in the NodeMCU paste the following command
ampy --port /dev/ttyUSB0 put led_blink.py main.py
References
The post is also available on the author’s personal website and the Podnet blog.