Installing Flutter

Flutter is an upcoming, cross platform mobile development app by google. Installing flutter may seem a little tedious, but once you’re done with this process, using it is much simpler. Now, the proess of installation varies for different operating systems. Follow the guide below depending on your respective OS.
WINDOWS
Pre Requisits:
Firstly, you’ve gotta have around 500 GB free, elese flutter will complain you have low disc space. You need more memory to start downloading the AVD and plugins. When you are working on Flutter, you’ll also need GitHub to upload your files or to download any of the prewritten codes on Git. You’ve got to install it by clicking the below link
While installing Git, let the installer set environment variable path, in order to avoid confusion. Follow the link for further information.
Cloning Flutter SDK
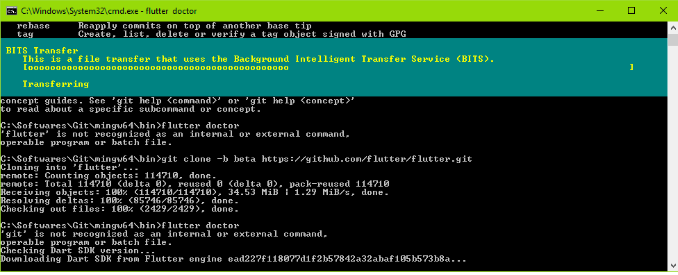
Open up a Terminal alternative in your machine like Git Bash. (Note that this will also work with Command Prompt provided you’re already in your Git executable path.) Copy and paste the following URL and hit enter the following command
$ git clone -b beta https://github.com/flutter/flutter.git
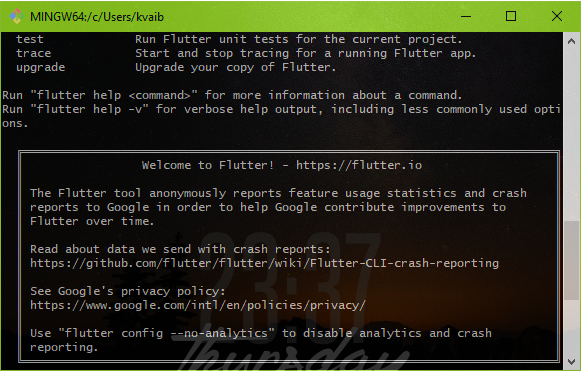
This will download all the necessary components and libraries to your username folder inside C drive. Wait for few moments until you get the following message:
Just like Git, add the nasty PATH for Flutter: This is done so that we can run the Flutter commands from any terminal session. It’s easy and quick. First we need to find out the exact location of the SDK. In the terminal, type in
$ where flutter
Copy the full path till \bin and not \bin\flutter. This should be something like this- C:\Users\kvaib\flutter\bin. Now, go to start and type in ‘environment variables’. Open ‘Edit environment variables for your account’ option. Enter the ‘Environment Variables’ window, under ‘User variables’ select the ‘Path’ variable, ‘Edit’, ‘New’ and paste the above path. Hit OK. Now reboot.
Checking Flutter
Type the following command into your terminal:
flutter doctor
This will install remaining tools along with Dart language SDK. You need to checkout which tools you need in order to run Flutter successfully like checking for Android emulator (this can be done by installing Android Studio) or installing the IntelliJ IDEA IDE with support for both Dart and Flutter (just search for their plugins and set the SDK path).
If you try to run the doctor command in Bash, it’ll not run as it’s currently not supported. But there’s a simple trick. Type
$ flutter.bat doctor
Configuring Editor
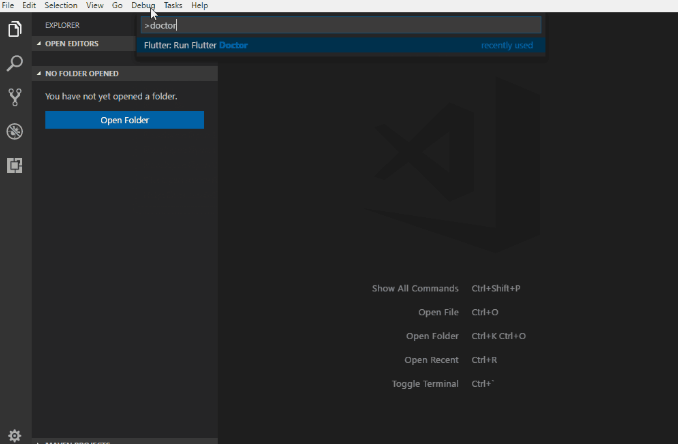
Visual Studio Code is a source-code editor developed by Microsoft for Windows, Linux and macOS. It includes support for debugging, embedded Git control and GitHub, syntax highlighting, intelligent code completion, snippets, and code refactoring. Visual Studio Code
Search for Extensions and then type Dart Code to install the plugin. Check to see if everything works fine…validate the install!: Invoke the Flutter: Run Flutter Doctor command.
Hot Reload
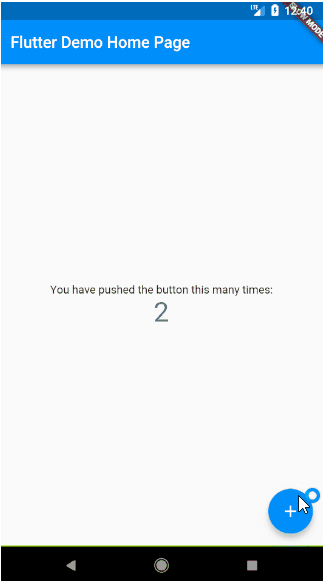
Hot Reload is the most awesome feature of Flutter. Any changes done to the code will be reflected almost instantaneously to the emulator. This happens in a blink of an eye. To test the same, we’ll make a new project in IntelliJ IDEA. All you need to do is to choose ‘Flutter’ as project type (make sure you have the correct SDK path), name it and hit ‘Finish’. Alternatively, you can follow this video. You’ll be greeted with a main.dart file where all the ‘main’ application code lives. It’ll be quite uncomfortable for some at first sight but we’ll just focus on the real deal. Keep your emulator up and running. Then hit Shift+F9 to start the default debug session. You’ll be able to run a decent app which quietly increments the value of counter every time you tap the ‘+’ button. Simple and Materialistic. Don’t click the ‘Stop’ button yet! Let the app be in run state.
There it is! You’ve now set up flutter and then updated its path and also executed the demo app! Now, create another project and name it Timer and copy paste the following code into main.dart file as bove and execute it.
import 'package:flutter/material.dart';

import 'dart:async';

void main() => runApp(TimerApp());

class TimerApp extends StatefulWidget {
@override
State<StatefulWidget> createState() {
return new TimerAppState();
}
}

class TimerAppState extends State<TimerApp> {
static const duration = const Duration(seconds: 1);

int secondsPassed = 0;
bool isActive = false;

Timer timer;

void handleTick() {
if (isActive) {
setState(() {
secondsPassed = secondsPassed + 1;
});
}
}

@override
Widget build(BuildContext context) {
if (timer == null)
timer = Timer.periodic(duration, (Timer t) {
handleTick();
});

int seconds = secondsPassed % 60;
int minutes = secondsPassed ~/ 60;
int hours = secondsPassed ~/ (60 * 60);

return MaterialApp(
title: 'Welcome to Flutter',
home: Scaffold(
appBar: AppBar(
title: Text('Timer'),
),
body: Center(
child: Column(
mainAxisSize: MainAxisSize.min,
children: <Widget>[
Row(
mainAxisAlignment: MainAxisAlignment.center,
children: <Widget>[
CustomTextContainer(
label: 'HRS', value: hours.toString().padLeft(2, '0')),
CustomTextContainer(
label: 'MIN', value: minutes.toString().padLeft(2, '0')),
CustomTextContainer(
label: 'SEC', value: seconds.toString().padLeft(2, '0')),
],
),
Container(
margin: EdgeInsets.only(top: 20),
child: RaisedButton(
child: Text(isActive ? 'STOP' : 'START'),
onPressed: () {
setState(() {
isActive = !isActive;
});
},
),
),
],
),
),
),
);
}
}

class CustomTextContainer extends StatelessWidget {
CustomTextContainer({this.label, this.value});

final String label;
final String value;

@override
Widget build(BuildContext context) {
return Container(
margin: EdgeInsets.symmetric(horizontal: 5),
padding: EdgeInsets.all(20),
decoration: new BoxDecoration(
borderRadius: new BorderRadius.circular(10),
color: Colors.black87,
),
child: Column(
mainAxisSize: MainAxisSize.min,
children: <Widget>[
Text(
'$value',
style: TextStyle(
color: Colors.white,
fontSize: 54,
fontWeight: FontWeight.bold,
),
),
Text(
'$label',
style: TextStyle(
color: Colors.white70,
),
)
],
),
);
}
}
Setting up AVD
An android Virtual Device is just s substitution for your device and it shows how the app is going to run and look on your selected device. Normally, Android Studio works if you connect your own device to it. But sometimes, AVD is required to make that happen without an actual device.
Set up Android Studio’s tools
Go to Preferences -> Appearance & Behavior -> System Settings -> Android SDK. Click on the “SDK Tools” tab and make sure you have at least one version of the “Android SDK Build-Tools” installed.
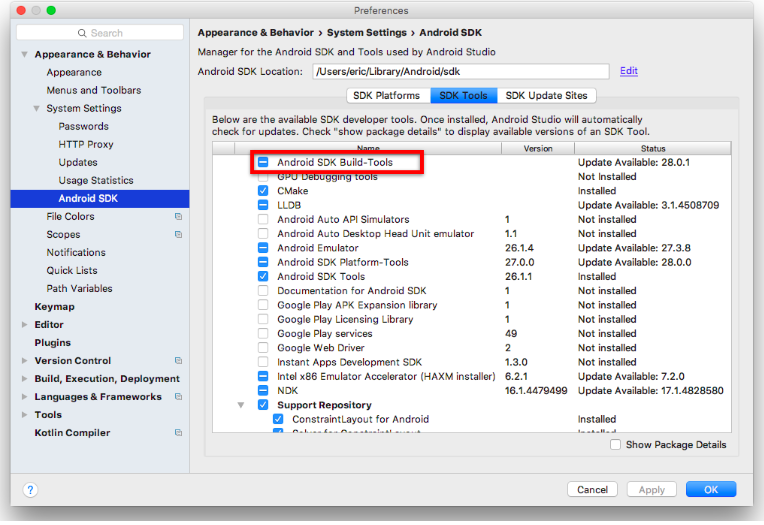
Copy or remember the path listed in the box that says “Android SDK Location.”

Setting up a virtual device
In Android Studio, go to Tools -> Android -> AVD Manager. Press the “+ Create Virtual Device” button.

Choose the type of hardware you’d like to emulate. We recommend testing against a variety of devices, but if you’re unsure where to start, the newest device in the Pixel line could be a good choice. Select an OS version to load on the emulator (probably one of the system images in the “Recommended” tab), and download the image. Change any other settings you’d like, and press “Finish” to create the virtual device. You can now run this device anytime by pressing the Play button in the AVD Manager window.
Your virtual device is now set up. You can see whatever you run and execute.
Happy Coding!